Get Your Pavement Winter-Ready with a Manager’s Checklist
When cold weather moves in, pavement performance shifts. The same surface that carried summer traffic without issue suddenly faces freezing temperatures, heavy snow piles, and constant plowing. For property managers, contractors, HOAs, and facility leaders, all that change means one thing: winter preparation is non-negotiable.
The challenge isn’t only about protecting asphalt and concrete. It’s about protecting people, budgets, and the reputation of the properties you manage. A well-timed checklist keeps small concerns from becoming costly emergencies once temperatures drop.
This guide introduces the pressures winter puts on pavement and walks you through the practical steps to get ahead of them. By following the checklist now, you’ll reduce risks, control expenses, and extend the life of your investment.
How Cold Weather Damages Pavement
Winter creates some of the harshest conditions pavement will ever face. Freezing temperatures pull water into cracks, then expand those openings overnight. After weeks of these freeze-thaw cycles, the surface weakens, and the base begins to shift. What started as a thin line can easily grow into a pothole or an uneven slab by mid-season.
Poor drainage speeds the damage. Puddles that linger after rain or melting snow often freeze into ice sheets, creating hazards for drivers and pedestrians. Freezing also puts pressure on seams and joints, eventually forcing them apart. This movement creates frost heave, where sections lift and form uneven ground that raises trip risks and complicates snow removal.
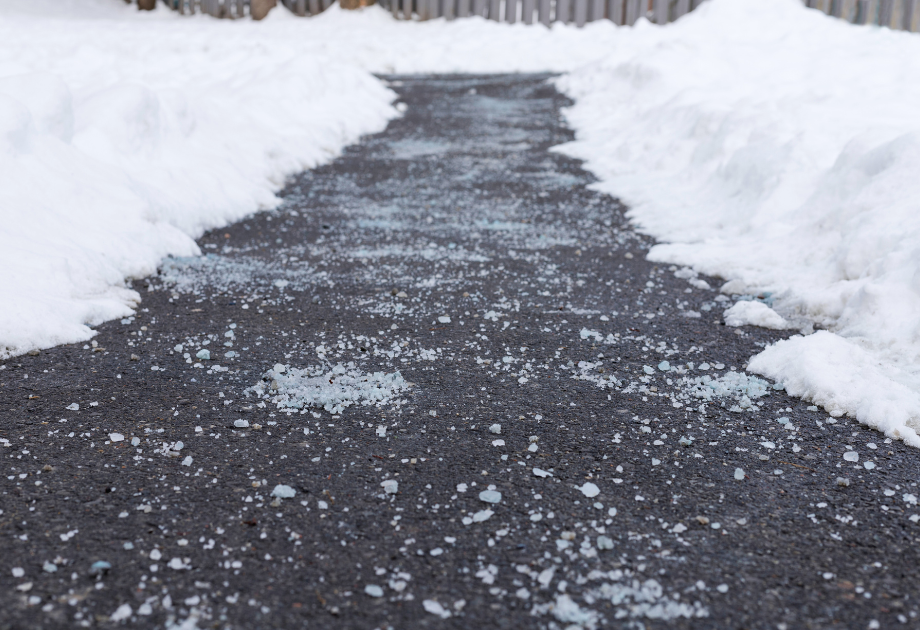
De-icers add another layer of stress. They’re essential for keeping lots and walkways open, but product choice has a long-term impact. Magnesium chloride and calcium chloride perform well in colder temperatures and require less material, which helps control costs. Rock salt is widely available, but heavy use around newer concrete can accelerate scaling and shorten service life. Sand or blended products improve traction but can clog drains if they aren’t managed. Careful selection lowers the chance of concrete damage caused by freezing while still keeping surfaces safe.
These combined pressures are predictable. By addressing them with a step-by-step checklist, you can reduce the chance of costly damage repairs and keep your property performing through the season.
Step-by-Step Pavement Checklist for Winter Readiness
Preparation works best when it follows a clear order. This checklist moves from surface issues to deeper risks, giving property teams a practical sequence to follow before the first freeze.
Step 1: Inspect Pavement for Cracks and Surface Damage
Start with a full walk-through of your property. Pay extra attention to entrances, loading zones, ADA routes, and pedestrian crossings, since those areas carry the most traffic. Look for cracks, raveling, or worn spots that stand out.
Even thin lines are important to notice. Once water enters, freezing pressure turns them into wider breaks. If water gets into a crack, freezes, and expands while vehicles continue to pass over it, the result is a pothole. Documenting these issues now gives you a record to plan repairs while conditions are still workable. This first step sets the foundation for everything that follows.
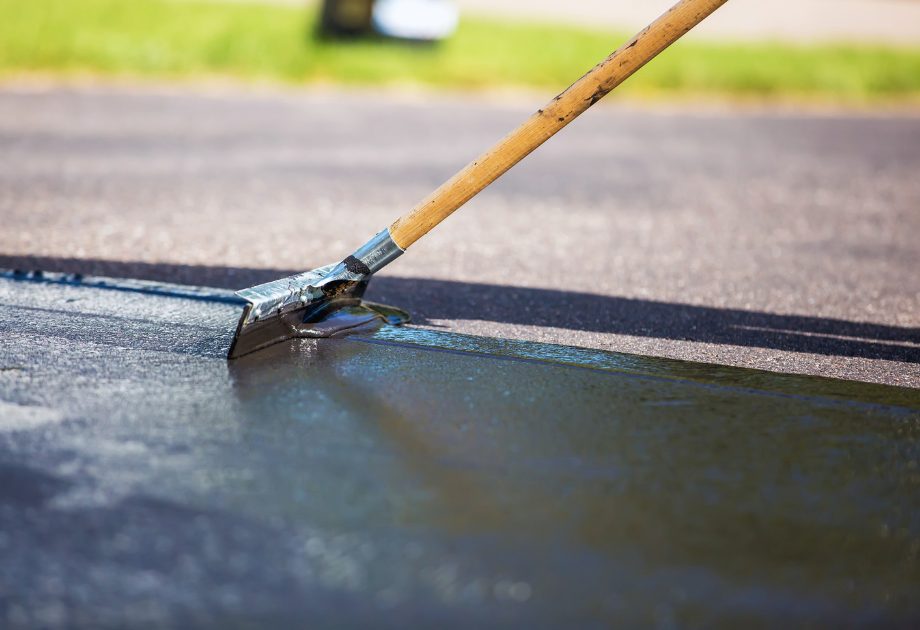
Step 2: Apply Sealcoating and Crack Filling Before Cold Weather
Once you’ve identified problems, protect the surface. Crack-filling closes off pathways where water could travel into the base, which is where pavement heave begins. Sealcoating adds a barrier against water, sunlight, and deicing chemicals. Together, they slow down wear and extend the surface’s life.
Timing matters here. Autumn offers warmer temperatures and dry windows that help these treatments cure properly. Wait too long, and the cold won’t allow materials to bond. Handle this step early, and you’ve just added years of service to your pavement.
Step 3: Improve Drainage to Prevent Ice Hazards
After sealing, comes flow. Water that stays on the surface creates hazards and accelerates damage. Remove debris from storm drains and catch basins, and mark low spots where puddles linger after rain.
When drainage is ignored, ice sheets form in those areas, and liability risks rise. Even small grading corrections can move water off the surface more effectively. This step not only protects the pavement itself but also keeps lots and sidewalks safer for daily use, reducing the chance of costly liability claims.
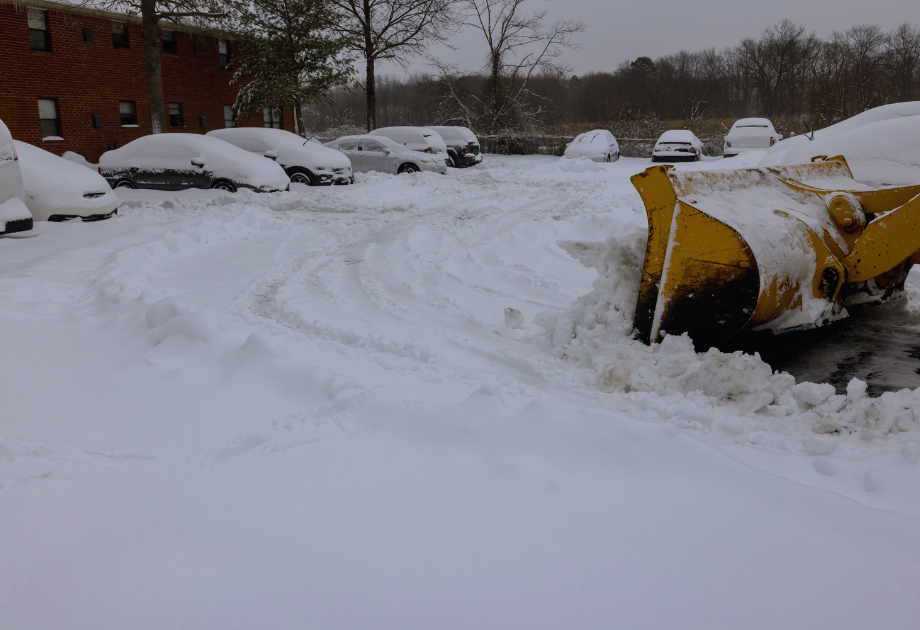
Step 4: Plan Snow and Ice Removal for Safe Access
Winter storms arrive quickly, so snow and ice management plans need to be set before the first forecast. Confirm your contract, walk through push routes, and identify where snow piles should go. Pile placement matters because meltwater often refreezes across travel lanes if it drains back onto the surface.
Confirm your plan covers ADA routes such as ramps, crosswalks, and accessible parking spaces. These areas must stay clear so everyone can safely reach your buildings.
Deicer use should also be part of the plan. Crews need to apply products at the right rates and in the right locations so surfaces stay safe without adding unnecessary wear.
A thoughtful snow plan balances access, compliance, and pavement health. By combining good plowing practices with proper product use and clear drainage paths, you protect your property while keeping people moving safely all winter.
Step 5: Schedule a Professional Pavement Inspection
A site walk shows you surface damage, but some problems hide below. That’s why a professional inspection is the final step. Our team at Pinnacle Paving checks for base weakness, drainage issues, and early signs of heave that often go unnoticed.
With decades of experience, we know where problems usually start and how to address them before they expand. Having this inspection done in the fall saves you from reactive mid-winter work and sets you up for better long-term performance.
Schedule Your Winter Pavement Maintenance with Pinnacle Paving
Preparation works best when it’s thorough and on time. That’s why our team handles every part of the process: site walks, preventive treatments, drainage improvements, targeted repairs, and snow plan coordination. Each step supports the next, giving you confidence your property will perform all season without interruption.
We carry out this work with our core values in mind: Precision in planning, Partnership in communication, Pride in workmanship, and Progress in results that stand up year after year. These values guide us to deliver projects on time, on budget, and built to last.
The best window to act is before the first freeze. Planning ahead lowers the risk of winter-related pavement damage that often leads to repairs on commercial sites, while also helping you manage costs and liability.
Ready to prepare your property for winter? Request an Estimate today.
